Showing posts with label DIY. Show all posts

Friday, September 30, 2011

DIY Fabric Freshener

Goooood Morning!!

Don't you LoVe the smell of fresh clean linens?? I do! I do! In the past have spent a fortune on fabric fresheners like GrabGreen, Lysol, Febreze, Mrs. Meyers, etc.

I saw a few recipes for making your own and decided to make a blend a'la ME!

I re-use my Febreze bottle but any spray bottle will do!

Recipe for 25-32 oz spray bottle
2 TBS Baking Soda
1/8 C Your Fave Fabric Softener (mine is Downy Clean Breeze)
2 drops of Tea Tree Oil [helps kill dust mites!]
Then fill your spray bottle with hot tap water

Voila!

{I've also used Downy Lavender Serenity in a separate bottle for nighttime!!}

Tootles,
TJ


I joined these linky parties


Wednesday, July 6, 2011

Slough off the winter with a little scrubba scrubba scrubba!!

The fam and I visited The Luffa Farm over the weekend in Nipomo.


If you haven't been there you really must go!! We were shocked to see what a luffa really is and how it grows.

We picked a luffa and a yummy scented soap from the store before we left (with our free geranium clippings to boot!!) Amazing the difference between a store bought and a natural luffa but I'll leave you to find all that out when you go.

As I was scrubbing away the day it reminded me that I used to make a killer body scrub!! Back in the day before I was chasing my sweet little beans I used to do a lot of things that I somehow forgot about. hehe Now that little A is getting older and M & W are much more independent I find I have time I didn't have before now!

I decided to give it a whirl and just used what I had laying around the house to make my first batch:


Here's my recipe:
1 C oil (your choice*)
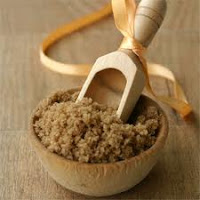
1 C brown sugar
4 chai tea bags (break all of it out of the bag and finely ground - mine was from Coffee Bean & Tea Leaf)
1 t cinnamon

I ground up the chai tea fine in my coffee grinder and combined all of the dry ingredients together in a bowl then added the oil until it got to a consistency that I liked. After mixing it all up I transferred it to a cute jar I had (I keep alllllll my jars, cups, bowls... between kids and crafts we find a use for any and everything. The cousins are over so just today the girls rummaged through my bin to find little bottles to make "face paint".. maybe I'll post on that one next!!)


I keep my jar in the fridge to last longer (usually about 4-6 weeks). These make awesome gifts or party favors!! And the mixture is great for quick at-home pedi's too!!!

I think the kids and I will mess around with some new fun recipes this week. I'll keep you posted!!

Hope you give it a try and then show me some comment love about how yours turned out!!

Tootles,
TJ

*Note about the oil you choose: Really any lightly scented oil will work. I've used olive, almond, grapeseed and apricot in the past. You can also get unscented body oils from a beauty supply.. whatever works.

I shared with:
Tip Junkie handmade projects

Tuesday, April 19, 2011

DIY PEEP WREATH

DAY ONE AS A COFFEE DRINKING, TOILET CLEANING (NOT AT THE SAME TIME.. WELL, OK MAYBE) MOMMY BLOGGER...

I bought a box of PEEPS for a craft idea I found online and then can't seem to locate the bookmark and cannot recall where I saw it!? :( But... fear not! I WILL craft these purple PEEPS!!

I will apologize in advance for my photography and photo quality. A nice Canon EOS 60D is on my wishlist this year and I am currently in the process of a free photography training class offered by HP!

First, you need these items:


Scissors
Ribbon
Package(s) of PEEPS any color (might need more packages depending on the size of your circle)
Glue gun & glue sticks
A cut out circle, square, ring, wreath... I used an old rubber ring off of a bowl that I kept around because I knew I would need it for something!

Next, cut apart each PEEP and then layout how many you will need. Use about 3 more than you think you need. I should have added 2 more...


Start anywhere and start-a-gluin' (be sure to add a dab in between each PEEP but try not to hit them with your metal tip or they melt.)


After you have squeezed in the last PEEP, turn it over and glue on your ribbon. I just used items I literally had around the house (this raffia ribbon was under Madi's bunkbed! LOL)


I didn't take a photo but I sat a bowl/plate on while it dried a little then I tied the ribbon in a bow but will probably add more raffia and a larger bow.


And there you have it! A fun PEEP wreath that will make the kids giggle and squirm with delight!

This project is part of an Easter landscape I'm setting up at home so stay tuned! 

Tootles,
TJ